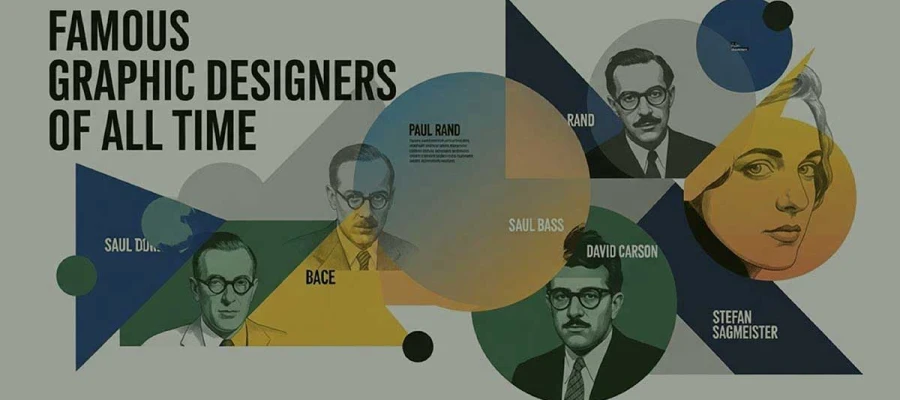
The graphic design process encompasses a detailed series of steps that a designer should know to bring creative graphic design ideas to life. Yes, it's seen that the designers do not apply their creative brain power. They just follow a brief guideline to achieve the defined goals.

Adhering to a graphic design process enables you to troubleshoot early, accomplish milestones, and finish your design without superfluous time, money, energy, or redundancies.
However, the design process is devoid of last-minute distractions, which people tend to associate with chaos!
In this blog, we share the key steps in the design process and focus on why each step is vital. We believe that today's blog post can help delve into the design process and elevate your understanding of graphic design works.
Now, let's begin to learn the process step by step.
To clarify matters, the graphic design process simply refers to how a graphic designer uses images and text to create striking visuals. So, no, it is so much more than pretty things and good fonts.
It's more than just an attention-getting design. It's capturing an explanation or simplifying a brand. These solutions are referred to as 'problems', and the means of addressing them is called 'design thinking'. It's a principle system that works to put people first.
In your mind, picture a post for an Instagram page belonging to a small local bakery. They do not have a clear plan. Without direction, you settle for adding a mouth-watering snap of one of their best-selling cupcakes.
But, if you employ the cupcake design thinking process, you stop and ask: “What is this client’s target demographic? What will evoke the desired emotion they’re set to experience after seeing the post?” Now the post is more than just a cupcake. It tells a narrative, relays a message, or beckons an invitation.
That is the allure of a powerful process. A working design keeps your work from drifting in the Dead Sea and ensures effortless, intuitive aid helps every visual selection have a purpose.
The 5 Steps of Design Thinking in Graphic Design:
Now, imagine you're assembling a jigsaw puzzle. Every piece is vital, and when they fit impeccably, the entire picture is coherent. The graphic design process works in a similar fashion. It's not about "sitting at your desk and doodling until something cool pops out." It involves clearly defined steps that guide you through understanding what you are doing, why you are doing it, and for whom you are doing it. Now, let’s focus on how you can actually solve this puzzle!
This is the very beginning: finding the reason behind the design. A creative brief acts as the architecture for the graphic design project. It highlights the client's needs, what the brand upholds, the target audience for the design, and the metrics for success.
The next step is conducting the primitive research, be it in person or through forms. So many questions, so little time.
Your design brief process should include:
A well-written brief ensures there is no miscommunication among teams right from the start.
Put that detective hat on. Understanding the brand, competitors, and what’s already in the market is always useful before attempting to start designing.
This context helps you appreciate the work ahead and can stimulate your creativity. For this, you need to:
Let loose your ideas. There is no need to limit yourself during the sketching process; try colorful styles alongside a unique layout design and mix them around. It does not need to be pun-intended perfect; anything goes.
You can draw in several different ways:
Things truly start to take shape from here on out. Sketching windows are at the core, serve as reminders and basic drafts for drawings, and outlines are placed on a ring binder, showing where everything will be situated.
An attempt can be elementary in every sense or quite vibrant, accomplished with images and colors.
Wireframe Types Include:
Design is to be brought to life, but only after client approval of the design mockup is granted. AKA, this is when you fully implement the real components and particulars, including colors and phrases, spacing, and even icons and text animations if they so choose.
At this stage you should:
Remember that no design is right the first time, and that's perfectly alright! At this stage of graphic design, it's your time to showcase the work to your client or team. Make sure to ask for their constructive criticism and be prepared for change.
Make feedback easier to provide through:
Note: This entire graphic design process might take several rounds, but that is perfectly normal.
The design can now be said to be in its index of perfection, along with the feedback it previously received.
At this stage, you are required to integrate the feedback and adjust the design accordingly. This is what we call iteration, and this is how we make a remarkable difference. The more effort you put into refining it, the more closely it meets the expectations.
For smooth iteration:
When the design is flawless, or at least very close to it, have everyone sign off on it. This should mean that all stakeholders have accepted it, and there will be no further adjustments.
To finalize it, you should:
Note: With endorsement, you now have permission to finalize everything.
That's it! Now you only need to organize the files you intend to deliver to the client, who may prefer them in additional formats, sizes, or even variations.
Here’s what you need:
For the last step, deliver the files. Always deliver the graphic design files in an organized folder, having all files named clearly, and add a short note if necessary. For designs, ensure it works on the designated platform it’s intended for.
To ensure a smooth handoff:
Think of taking a trip; you must pre-plan, from setting goals to checking routes and ensuring you pack all your necessities. You don’t just dress up and open your vehicle like graphic design software; there is more to design than fixing shapes in Adobe Illustrator, Photoshop. The tips given sharpen the focus without stunting creativity and make the experience frustration-free, regardless of whether it’s your first graphic design project or if you are multitasking.
Give design briefs some structure and adjust them to suit your needs. Add rooms if they help, or numbered checklists if those are helpful. Note down quotes and color palettes that can be useful later.
As long as your requirements are clear, the creative brief is at your disposal as a template. Always make sure to keep it inductive for your projects. The structure should influence actions, not define outcomes.
The instructions given should foster energy and not divert it. Streamlining reinforces productivity, leading to sequential work without hitting any standstills. Having a creative brief fosters an effective design outcome.
It contains all the ingredients: colors, fonts, goals, visuals – A creative blueprint. With set goals in your brief’s words, punctual deadlines can transform into smooth sailing.
Often, design is not a solo sport. You usually end up working in a team. So, how do you ensure that everyone is on the same page? Understand who is responsible for what. One person may be in charge of illustrations while another may handle visual communication with the client.
Use tracking applications like Trello or Notion. For those with freelancers and remote teammates, regular check-ins do wonders. Defined responsibilities eliminate role ambiguity and bounce backs. No one loves surprises, especially last-minute ones, don’t you think?
Larger branding and graphic design projects may seem too daunting. It often helps to break them down into smaller tasks. Instead of “Design the website,” start with “Sketch homepage layout design,” “Choose font styles,” and “Make icons.” Each task needs a deadline, but allow yourself some grace.
We all know life happens. Timelines give the illusion of having listless tasks organized. Plus, having small milestones to check off is satisfying, which motivates you to keep going.
Clients might not love the very first concept you show them. That's absolutely achievable, isn't it? Try presenting multiple options. One can be edgy, the second can be on the modest side, and the last can be the most conservative.
This allows the client to pick what works best for them easily and helps prevent revision after revision down the line. When explaining each design, why you applied that design, it demonstrates that you made an effort.
That will positively impact the amount of feedback you get later on, as well as reduce unforeseen graphic design developments.
Imagine this straightforward set of instructions can be useful when designing. At 10%, showcase mood boards or sketches and assess if you’re in the right direction. By 50%, start collecting inputs regarding the general vibe and layout of the design.
Then, at 99%, make remaining remarks before submission. This ensures, “Do we have to change everything?” won’t be the end. Clients feel like they’re participating, while the graphic designer feels like they won’t need to redo tasks. It's similar to checking that cake before it's baked.
You need to ensure that certain design elements are in order before sending your work to the clients. For instance, is the branding color incorporated? Will this work on mobile as well as desktop? Is the information easy to read?
Have the set fonts been used? With a little effort, you can easily avoid unnecessary awkward encounters afterwards. Attempt to understand the client’s worries and concerns. What do you think they might ask?
Make sure you reason out before showing the design. With this approach, the client sees that you are a creator who solves problems.
Choosing a font is one of the most critical steps in graphic design process. Fun and curly fonts can be used in designs, but the purpose is defeated completely if the words cannot be read. For beginners, it is advisable to use basic sans-serif fonts such as Arial or Helvetica.
The letters themselves are neat and crisp. There is also the option to tinker with size, weight, boldness, as well as the amount of white space around the letters. If people have to squint to read your poster, you have already lost their attention.
Feedback does not signal wrongdoing. It highlights areas for improvement. Rather, try to ask for feedback at every stage of the project. A simple question like “What do you think about this mise en scene?” is better than requiring an extensive revision later.
Don’t take feedback too personally; use it to refine your skills. And retain the copies that you have sent out. Both you and your clients will appreciate being able to check back easily and track progress. It helps everyone feel collaborative and smoothens the entire process, amalgamating all in one.
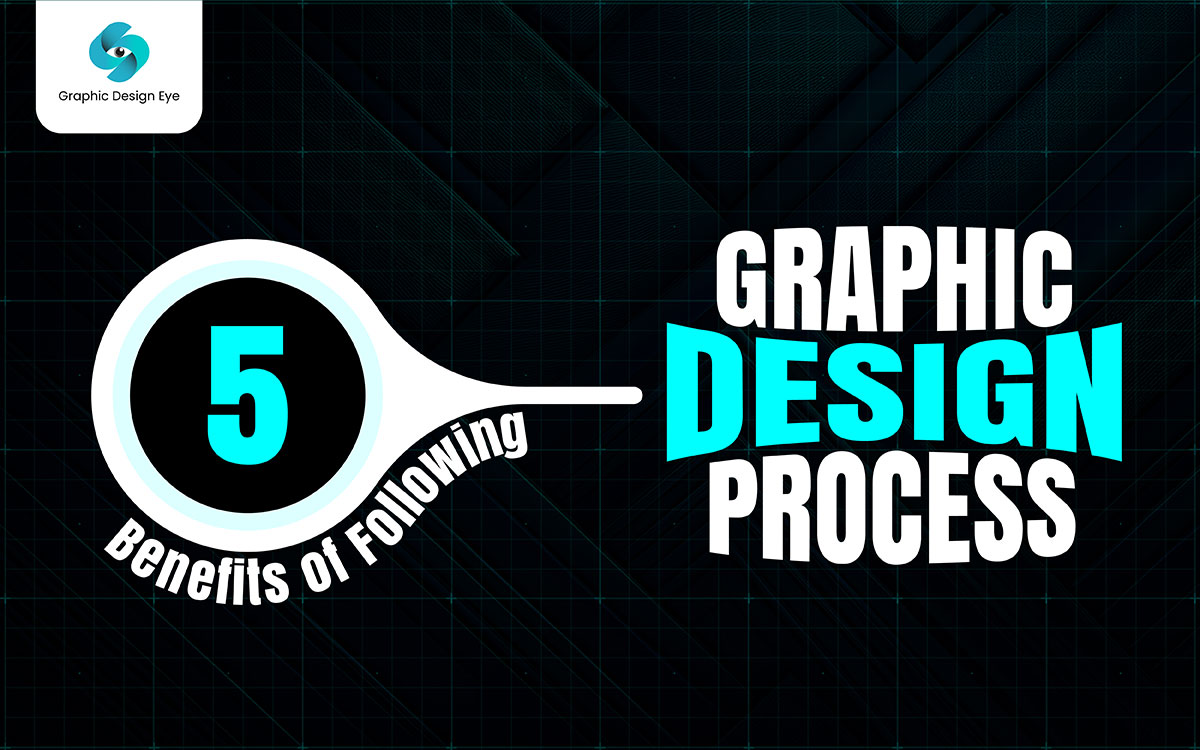
Let’s not kid ourselves; winging is always fun at the beginning. You start with your design, pull out a few shapes, color them, and cross your fingers. Then what? You hit a standstill. The client is confused. You are deep in uncertainty about how things went so wrong. That is when the value of following a genuine process clicks. Let's explore the benefits of improving workflows using a graphic design process.
Every creative design process starts (and should start) with a sense of curiosity. Before rushing into visuals, you stop and ask, “What’s the goal here?” In this case, you are trying to understand the client’s brand, his/her tone, and, most importantly, the audience. These questions help you avoid guessing later and, therefore, are golden.
This is like interviewing the project before you design it. You will also notice clients respect this approach. It shows that you are thoughtful and indicates that the graphic designer is serious about doing his or her best work.
And the icing on the cake? You’ll seldom find yourself redoing work because of a detail being missed. It literally takes you a few smart questions to avoid doing tons of fixes later.
Bringing everything into focus is one of the advantages of using a design process. Instead of running in circles trying to make sense of the client's wants, the process outlines a strategy to work towards a defined goal.
Now you don’t just design “something nice” but rather a post to raise awareness, a poster to capture attention, or a logo that offers a friendly vibe.
Providing that clarity enables stronger decision making and helps stay focused. You are not swayed by what “looks cool.” You target what is functional, and that enhances your design’s impact.
To be honest, clients are interested in understanding what is happening. Nobody likes being in the dark and shocked by changes made at the last minute. Following a clear design process, you construct a timeline and keep the client engaged throughout the effort. They are not just sitting idle; they are part of the process.
You present drafts, receive responses, and justify your design decisions. Everybody enjoys a smoother experience, and clients appreciate thoughtful organization. They trust you more because of your thorough and structured process, and understand your design skills.
The question, “Did I skip a step?” comes to mind after you complete certain projects. That is where a creative design process works as your safety net. It provides a framework within which you can operate, ensuring nothing gets left out.
With constant practice, your output starts becoming more and more consistent. That is good. Clients know exactly what to expect from you, and all your designs feel polished.
And you will exert less effort figuring out what to do next, instead simply following the path you have already set out. It is akin to building a routine, for sure, you can always modify it, but the core will ensure things stay steadfast and dependable.
It can feel as though time is moving at lightning speed when you are in the zone with a creative task. When working on multiple, unrelated concepts, jumping from one idea to the next can get chaotic very quickly. The design process allows you to create in steps.
You understand your next step, absolving you of the stress of figuring out what needs to be done next. This is incredibly helpful, as your design will no longer be in shambles from unnecessary redesigns or backtracking that would have otherwise been required.
You identify issues much earlier, such as problems with required information, unclear objectives, technical difficulties, and other blocks or hurdles critical to the design process. This results in less mayhem and frantic revisions just before deadlines.
In the same way that meal prepping saves time and chaotic cooking, having a design process allows you to build and manage your projects in ways that are clean, straightforward, structured, and less stressful.
How was the article? Helpful and easy to understand?
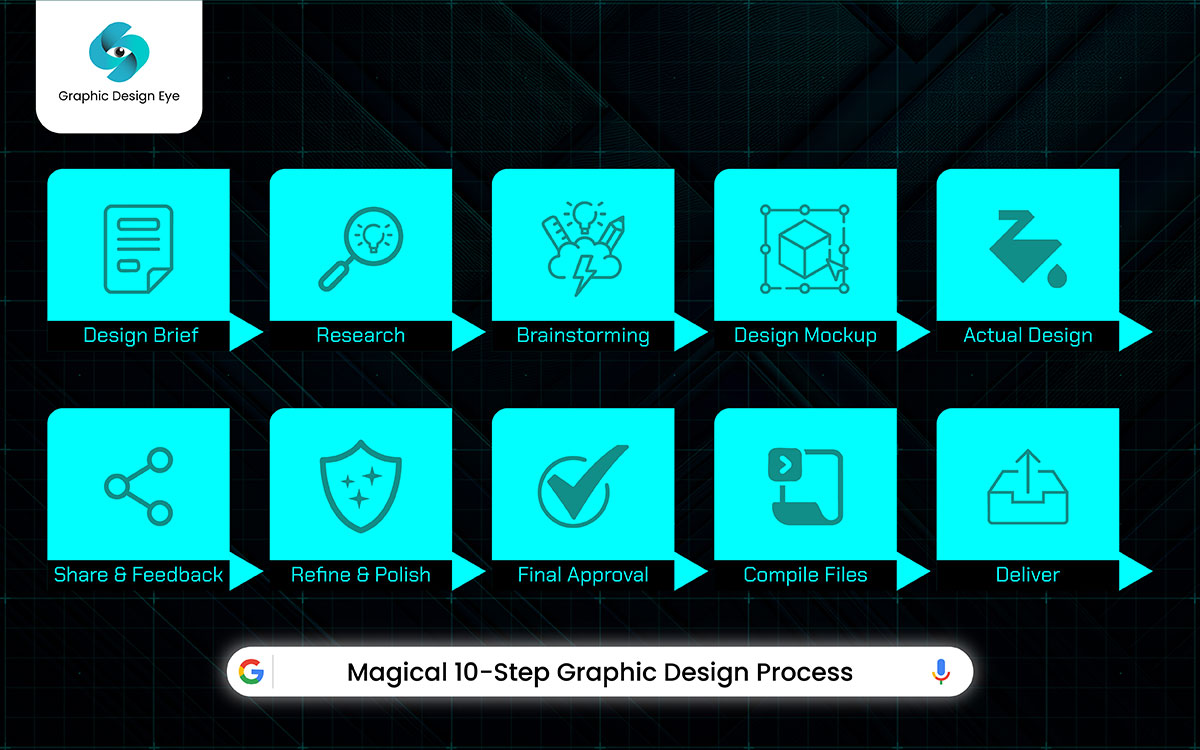
Hopefully, you have unfolded the graphic design process and understand well how graphic design works. The above 10 steps of the graphic design process can help you get on the right track.
Look, if you go with the right steps of graphic design, you can save time, make your design meaningful, and bring clarity to your designs. Also, with the steps, you can keep focus on preparing the best work without losing your attention.
Also, the above steps can assist every graphic designer in understanding the needs of buyers by providing smooth, concise feedback without any gaps in understanding.
Still, if you're in any confusion, contact us right now. We're 24/7 ready to hear your words!
Have a good day! 🙂