Shadows create realism. They help buyers picture how the items fit into their lives. You might think shadows are a small detail, but they make a big difference. People love good visuals. A well-lit product with the right shadow shows quality and professionalism.
Learning new editing techniques can seem hard, but it’s not! A few easy tweaks can help a lot. Just think about how a little creativity can boost your sales. When you see a beautifully displayed product, it feels good, right?
I get it—you want your product images to shine. This is important as we learn how to add shadows. It might seem small, but it can lead to great results. Investing time in adding shadows to your images is worth it.
Now, let’s dive into this guide on how to add shadows to a photo. Together, we can elevate your online store!
When we talk about "shadows" in product photography, we mean how light interacts with objects. Shadows create areas of darkness around or under the product. It’s interesting because shadows are just places without light. But they are important. They help make the product feel real and three-dimensional. Let’s break it down:
What is a Shadow?
Shadows happen when light hits a product. The product blocks some of the light. This creates a shadow on the surface behind or below it.
Purpose of Shadows:
Shadows are more than just dark spots. They add life to the image and make the product stand out.

You might be surprised to hear that shadows play a huge role in product photography. They aren’t just dark shapes on a surface; they can completely change how a product looks. Here’s why they matter:
Shadows Create Depth:
Shadows Highlight Features:
Shadows Set the Mood:
Shadows Help with Focus:
Shadows also help in storytelling. They can suggest a time of day or even evoke feelings. When you photograph a lamp, for example, shadows can hint at a cozy evening.
In product photography, shadows are more than just an afterthought. They are essential for creating depth, highlighting features, setting the mood, and focusing attention.
I often think about how clients overlook shadows. When they embrace them, the results can be stunning. Let’s take a step back and appreciate the power of shadows in your photography!

There’s more to shadows in product photography than meets the eye. You’d be surprised at how shadows shape the whole vibe of a product photo, making it look either grounded and real or just floating there, looking flat.
So, if we’re talking about bringing your product photos to life, shadows are a must. We’re diving into the types and uses of shadows in product photography, so buckle up!
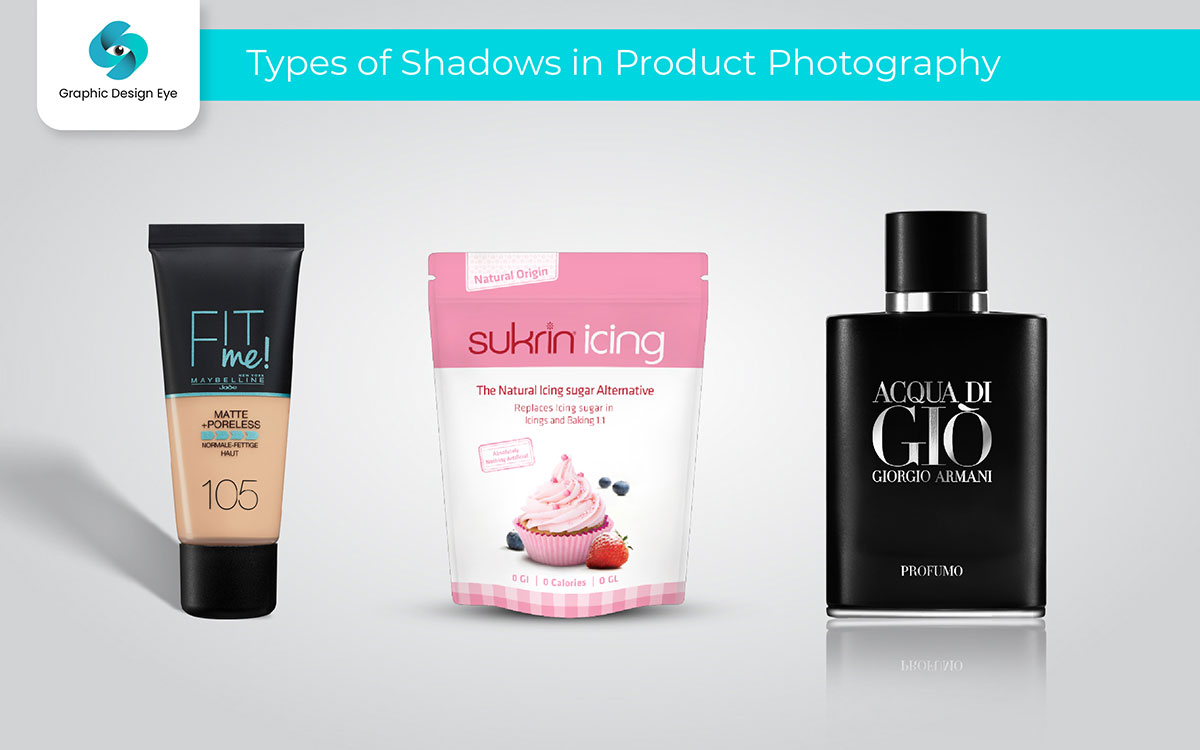
Let’s get to the point. There are two main types of shadows in photography: natural and artificial. Natural shadows come from sunlight or other natural light. They feel soft and warm, making the product look real.
The best part? You can use natural shadows for a simple, honest look and artificial shadows when you want something sharper and more professional.
Cast shadows appear to the side of a product. They make it look like the product is really sitting in the photo. When light hits the product, it “casts” this shadow to one side or underneath, giving it a solid look.
To put it bluntly, casting shadows adds life and makes products feel grounded in the photo.
Drop shadows are a special type of shadow. They look like a small shadow right below the product. It’s as if the product is gently hovering. This shadow is subtle but really helpful for making the product pop out.
Long story short, drop shadows are clean and effective. They make products stand out without making things look busy.
Reflected shadows look like a gentle reflection of the product right beneath it. Imagine the product is sitting on a smooth, glossy surface—this shadow gives that feel. It makes the product look high-quality, almost like it’s on display.
Believe it or not, reflected shadows add a classy, expensive feel. They’re perfect for products that need that touch of luxury.

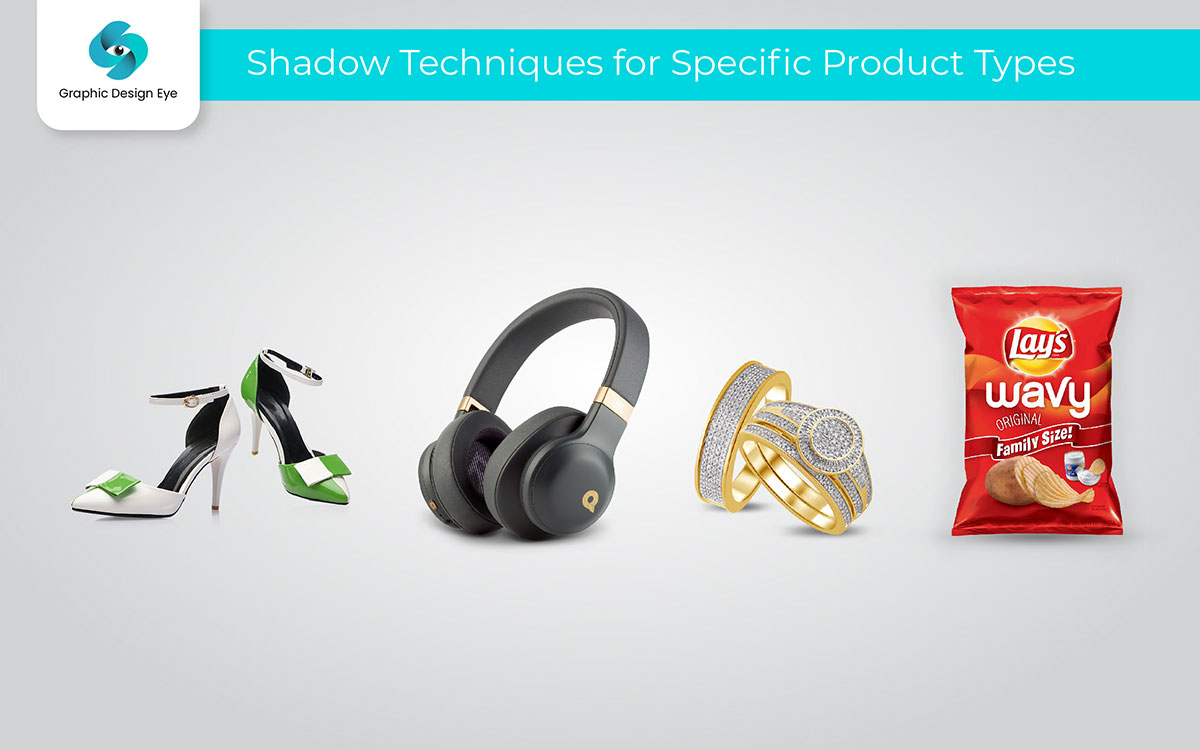
Have you ever noticed how some product photos really catch your eye? It’s often the shadows that make everything pop. Shadows do more than just sit behind products, they give them personality, a vibe, and even a story. I’ve been thinking about this lately. Shadows are like secret storytellers. Let’s dive into how different shadows work their magic for various products and why these small details can have a big impact.
Guess what? Shadows can work wonders for fashion photos! When you add a little shadow to clothing, it doesn’t look flat. You add depth and give the fabric life. The more texture a shadow highlights, the more “real” the fabric appears. Customers can almost feel the softness of a wool sweater or the toughness of a denim jacket right through their screens.
Now, electronics are a bit different. Shadows here don’t need to do too much. They just need to be sharp and purposeful. A shadow around a laptop or smartphone makes it look sleek and modern. Just a hint of shadow gives off a “high-tech” vibe that fits perfectly with modern devices.
Jewelry is where shadows really shine. The right shadow brings out the beauty of each piece. Imagine a bracelet or ring with the perfect sparkle. Shadows can make it glisten and show off every tiny detail. You know that feeling when something looks extra special? That’s what shadows do.
Shadows don’t just make things look good—they make them look delicious. The right shadow can make food photos feel inviting. Think about soft shadows on a fresh loaf of bread. Suddenly, you can almost smell it! Everything falls into place when shadows make food look warm and appetizing.
Adding a natural shadow in post-production is all about making things look real. The goal? Make the object look like it’s actually sitting in the picture, with shadows that feel right. Here’s how you do it:
| Step | Description | Quick Tip |
|---|---|---|
| Check Shadow Color | Shadows aren’t always just black. | Add slight color based on surroundings. |
| Position & Angle | Place shadow opposite the light. | Match the main light direction. |
| Soften Edges | Real shadows have soft edges. | Blur and lower opacity. |
| Add Environment Color | Shadows reflect nearby colors. | Use hints of colors from the scene. |
| Match Shape | Shadows follow the object’s shape. | Shape shadow to mimic the object. |
Putting It All Together
It’s wild to think that creating a shadow isn’t just about where you put it. It’s about matching it with the lighting in the photo. Each change you make helps the shadow feel like it’s truly part of the picture.
Here’s a quick recap:
With these steps, your shadow will look natural, like it really belongs there.
You won’t believe it, but yes, I’ve edited unwanted shadows in post-production countless times! Honestly, it’s like giving a photo a fresh start. In my experience, using advanced tools and techniques can make a huge difference, especially when it comes to showcasing products or important visuals.
If you ask me, shadows can distract people from what really matters in a photo. Here’s why I think it’s important to remove them:
Focus on the Main Subject: Shadows can pull attention away from the main object. You want people to notice the product, not the dark spots around it.
Balanced Lighting: Uneven shadows can mess up the whole picture. Clean lighting makes everything look better and more professional.
Cleaner and Polished Look: When you remove shadows, the image looks sharp and neat. This is especially important for commercial photography, like when showing off products.
Now, here’s the thing, getting rid of shadows isn’t just about erasing them. It’s about making the final picture look natural. Here are some easy techniques I use all the time:
Cloning and Healing: Funny thing is, I use cloning tools to copy parts of the image without shadows. Then, I blend those parts over the shadowed areas. It’s almost like painting over the shadow to make it disappear smoothly.
Dodge and Burn: These tools help me adjust the light in specific areas. As you might expect, I can lighten the harsh shadows while keeping the natural look. This way, the image stays true to its original feel.
Layer Masks:Layer masks are really helpful. They let me focus only on the shadows without changing the rest of the picture. This means I can soften or remove shadows while keeping everything else intact—seriously, it’s a lifesaver!
Brightness and Contrast Adjustments: If the shadows are light but still noticeable, sometimes I just tweak the brightness and contrast a little. This helps blend the shadows into the image and gives it a more even look.
Truth be told, I mainly use Adobe Photoshop for shadow and unwanted object removal. It has great features, like clone stamping and healing, that let me make precise changes. If I have a lot of images to edit, I use Lightroom. It’s great for lightening shadows quickly across many photos.
Now, I won’t lie, come to think of it, some shadows are harder to remove. This is especially true for shadows on textured backgrounds or complex surfaces. Shadows on flat surfaces? Easy! But when they’re on rough textures, it takes extra care.
Sometimes, it’s not possible to remove all the shadows without affecting the overall look. And here’s the kicker, I always aim for the best results, but some shadows just won’t go away!
After I remove the shadows, I don’t just stop there. Looking back, it’s clear that the finishing touches are important. I do things like color correction, contrast adjustments, and texture restorations. These little tweaks bring the image together and make it look natural.
It’s no wonder that removing shadows really improves the image quality. You get sharper, cleaner, and more professional-looking images. These are perfect for websites, print materials, and social media post design.
To be honest, every image has its own quirks, so we'd love to check out yours and see what we can do! Feel free to reach out, and we'll help find the best approach to get those shadows out of the way for a polished, professional look.
As we finish our guide on how to add shadows to a photo, let’s remember how small changes can really boost your sales. It’s not just about the shadows; it’s about the story they tell about your products.
Shadows give your items a personality, making them relatable to your customers. We all love scrolling through beautiful images.
When you spend time improving your visuals, you invest in your brand's success. Shadows are like magic; they change ordinary photos into captivating ones and help build trust with your audience. These simple changes can lead to big results.
Who doesn’t want to boost their sales while showing off their products? Every detail matters, and shadows can help you stand out in a crowded market. And remember to have fun with it! I know it can feel overwhelming, but once you get the hang of it, you’ll see the difference.
Wait… what if I shared a fun twist? Imagine this: shadows do more than just make your product images look better; they tell a story. Each shadow gives your items a little personality, helping customers feel closer to them. It’s amazing how this small change can increase interest and sales!
At Graphic Design Eye, we help you image shadow service your photos and make your brand stand out. Let’s bring your products to life!