This software has made it easy to design anything you want. Whether you are a book publisher or a beginner in digital art and illustration, you should acknowledge things before going to apply them. For book publishers, dealing with a professional graphic design agency is the best solution to ensure the most engaging design for magazines and book covers.
The article is a DIY guide for how to design a book cover which will help beginners. Let’s start it,
Though there is a proverb that goes that ‘don’t judge a book by its cover but you should also count ‘seeing is believing.’ The book cover works to create a first impression among the readers. If the book isn’t by any famous author, it needs the first impression to catch the reader’s attention. Readers love to have an eye over the summary of the book included on the flip or back of books.
But to take the reader in that part, you have to get attention through its cover. Therefore, before designing a cover for any book, consider these five things to follow.
The first thing that comes when designing a book cover is, getting the storyline, what it says, and trying to define the genre. Don’t forget that the cover should be a reflection of the content. The cover should come in a way that can tell readers what the book is about.
Therefore, if you are going to design a book cover, just try to get a little insight into the book so that you can illustrate the same feelings on its cover.
When you know the storyline of the book, it will be easy to build up the design concept for the book cover. Concept building not only functions about how you are going to design the cover but also digs for the best adaptable design. However, you don't have to be as complicated to design all the book covers. Some authors want to include their portrait image and some of them just want to keep it simple like retro shapes and elements.
Besides, the book cover can be a specific image, only typography, classic drawings, and so on. Unless you aren’t making illustration art, always try to make things easy to understand for the readers. Put some context on the design to get the first impression.
Color and typography are the two essential elements of the book cover. Color is distinct and impactful which can play in readers’ minds. Each color left a different impression on people’s minds. But when choosing colors for the book cover, think about the readers and don’t go for your comfort.
Go for what makes readers feel comfortable when they see the book in the store. If you are facing difficulty choosing colors for the book cover, you can determine two or three different colors and can ask for choosing the most relatable one for the third person.
Also, you have to pick a font style to get stuck to the book’s name and also the other typography that will be included on the book cover. Every book has a particular name and the author’s name should be described on its cover. Typography has become a trend certainly and there you see people also for attractive typography.
Typography can lure attention and lead to a specific action. From advertising to any kind of text-based requirement, we have to think about the font style and size. Although there is no shortage of stylish typographic fonts and most of them are free to use. And some are available in paid as you have to pay to use these for your purpose.
If you are a starter and don’t have enough experience in digital art and illustration, you can get inspiration over the internet. The Internet is the storehouse of all resources and information. If you lack ideas while designing a book cover, just search about the preferred genre book cover design.
And you will find huge instances to boost up your mind. However, you shouldn’t copy other book cover designs to make up your own. It will be charged with violating copyright law as all kinds of digital art and design are bound by copyright. Therefore, follow the experts but don’t try to be like them. Do things with your creativity and discover newer things.
Finally, always keep in mind that, you have to make things simple, not complicated for the readers. In the digital world, people hate to see things that they don’t get easily. For book covers, minimalistic and capturing design is always preferred. Minimalist book cover design can illustrate things and engage readers in them.
If you don’t have any idea about minimalist design principles, you can do some research on the internet about it. Not all designers have the ability to bring the actual concept into a simple design. If you, have it, you are one step ahead of averages.
Let's see the process of designing a book cover in Photoshop. To follow this, you must have installed Adobe Photoshop on your computer. If you, have it already, just step by step what the guide says.

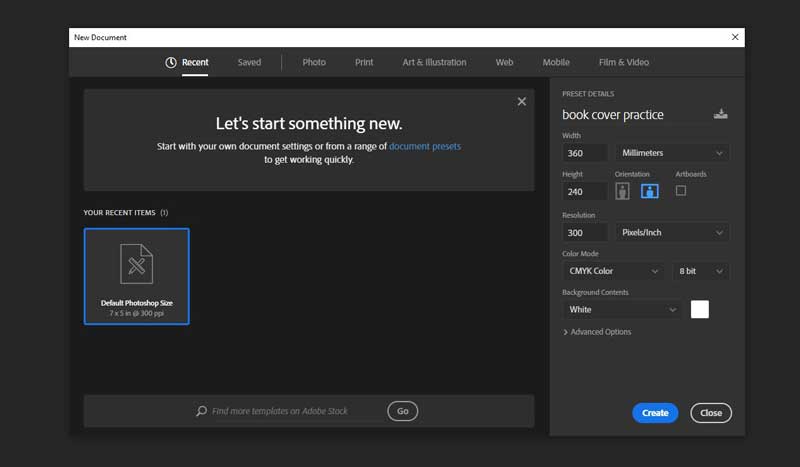
Open Photoshop in your system and create a new page for the operation. To take a new page or canvas, you have to go to File> New. A short window will appear where you have to input the file name as ‘book cover practice’ height, and width of the cover.
Remind that you have to know the measurement of the original book so that the cover comes attached when it will print on the book. Also, you must know about the spine width as it is highly important to fit the cover over the book. The spine width is the mid-section of the cover where it binds the book pages. Spine width should be measured according to
The number of pages
Blank pages
Paper thickness
There are free spine width measuring calculators you can get online. Use them to exactly measure it with the required data.

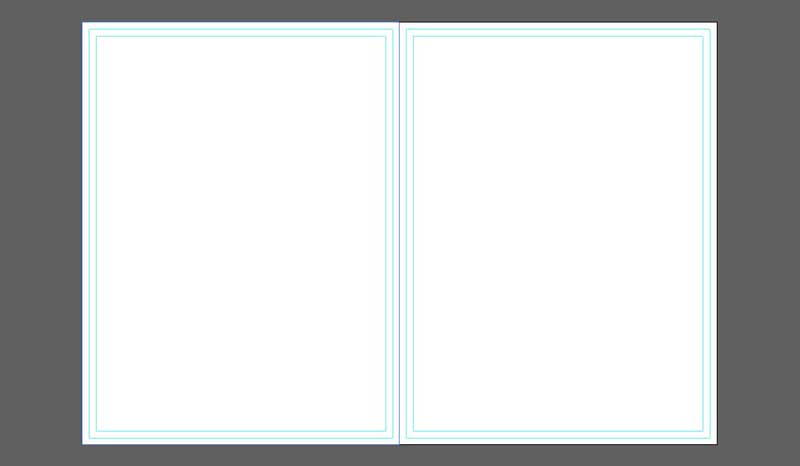
Photoshop has included so many smart features that allow users to do operations unerringly. The guide is one of the Photoshop features that provide some fleeting lines on your design to ensure that you are going correctly. It helps to position images and objects precisely on the design and it is non-print. We need to set up guides on the created page maintaining spine width, front cover, and back cover sizes. To use guides, you need to visible the rulers on your current window.
If you have a ruler then Ok, if not, no problem, you just need to make it visible. Go to ‘View’ and select the ‘Ruler’ option. When the ruler is visible, you can see it in both vertical and horizontal positions. Click any of the rulers and drag, it will deploy strict lines you can move and position anywhere on the page. Or you can also do it by going ‘View’ then ‘New Guide’ then setting the orientation as you require. You have to input vertical/horizontal for the ruler you need.
Do it every time you need a vertical or horizontal line to create a guided structure over the page. Your guide should look like this. You can also check whether the both front and back cover sides remain the same or not. For this, select the Rectangle tab from the toolbar then select the full left page of the book cover.
Then duplicate and place them on the right-side page. You can see if there is any excess left on the right page. If there is excess, you have to cut it out from the cover. To do this, select the background layer from the layer panel, select the crop tool and drop out the excess from the cover page.

We've structured the book cover with guides and now it is easier for us to design the book cover. In this step, we will affix the cover image and do other initials including the book and author’s name, etc. To include an image, go to File > Open > choose a picture that you want to include in the book cover.
The picture will open in a new window so you have to merge it with the previous working space. Therefore, drag and drop the image where you are working. Select the image layer from the layer panel and take it above all. Now you have to position the image as the cover itself.
You can make the image cover the whole area or just keep it on the front page. For this project, we are including the image on the right cover page and keeping the backside blank to include the writer or summary.
Now we will include the book’s name, the author’s name, and the summary or writer bio if needed. To create the book and the author’s name, select the Text tool from the toolbar or use ctrl + T as a shortcut. Type book name or author name what you want and don’t forget to customize the font size and style.
Choose the font style that goes with the book cover and genre. You have to also include the book name in the spine area as it is mandatory. To attach the book name in the middle spine area, write the name anywhere on the page > select its layer > then go to Edit > Transform > Rotate 90 clockwise. Then you will get the letters in a vertical position which you can drag and drop to the spine area of the book cover.
You can go through the same way including the author’s name, and publisher’s logo in the spine area.
After completing the book cover design, look for adjustments, edits, and anything you need to include. You can add effects to have some changes in the cover image colors, gradients, and textures and can apply masks and shadows to have a great look in the texts. Don’t forget to use a book mockup to present the design professionally.
Mockups are free to get on the internet and you can download and use them for your purpose. Mockup gives a professional look and visual art designed by experts. Therefore, don’t forget to show the design using a mockup.